 EN
EN  Romana
 Magyar
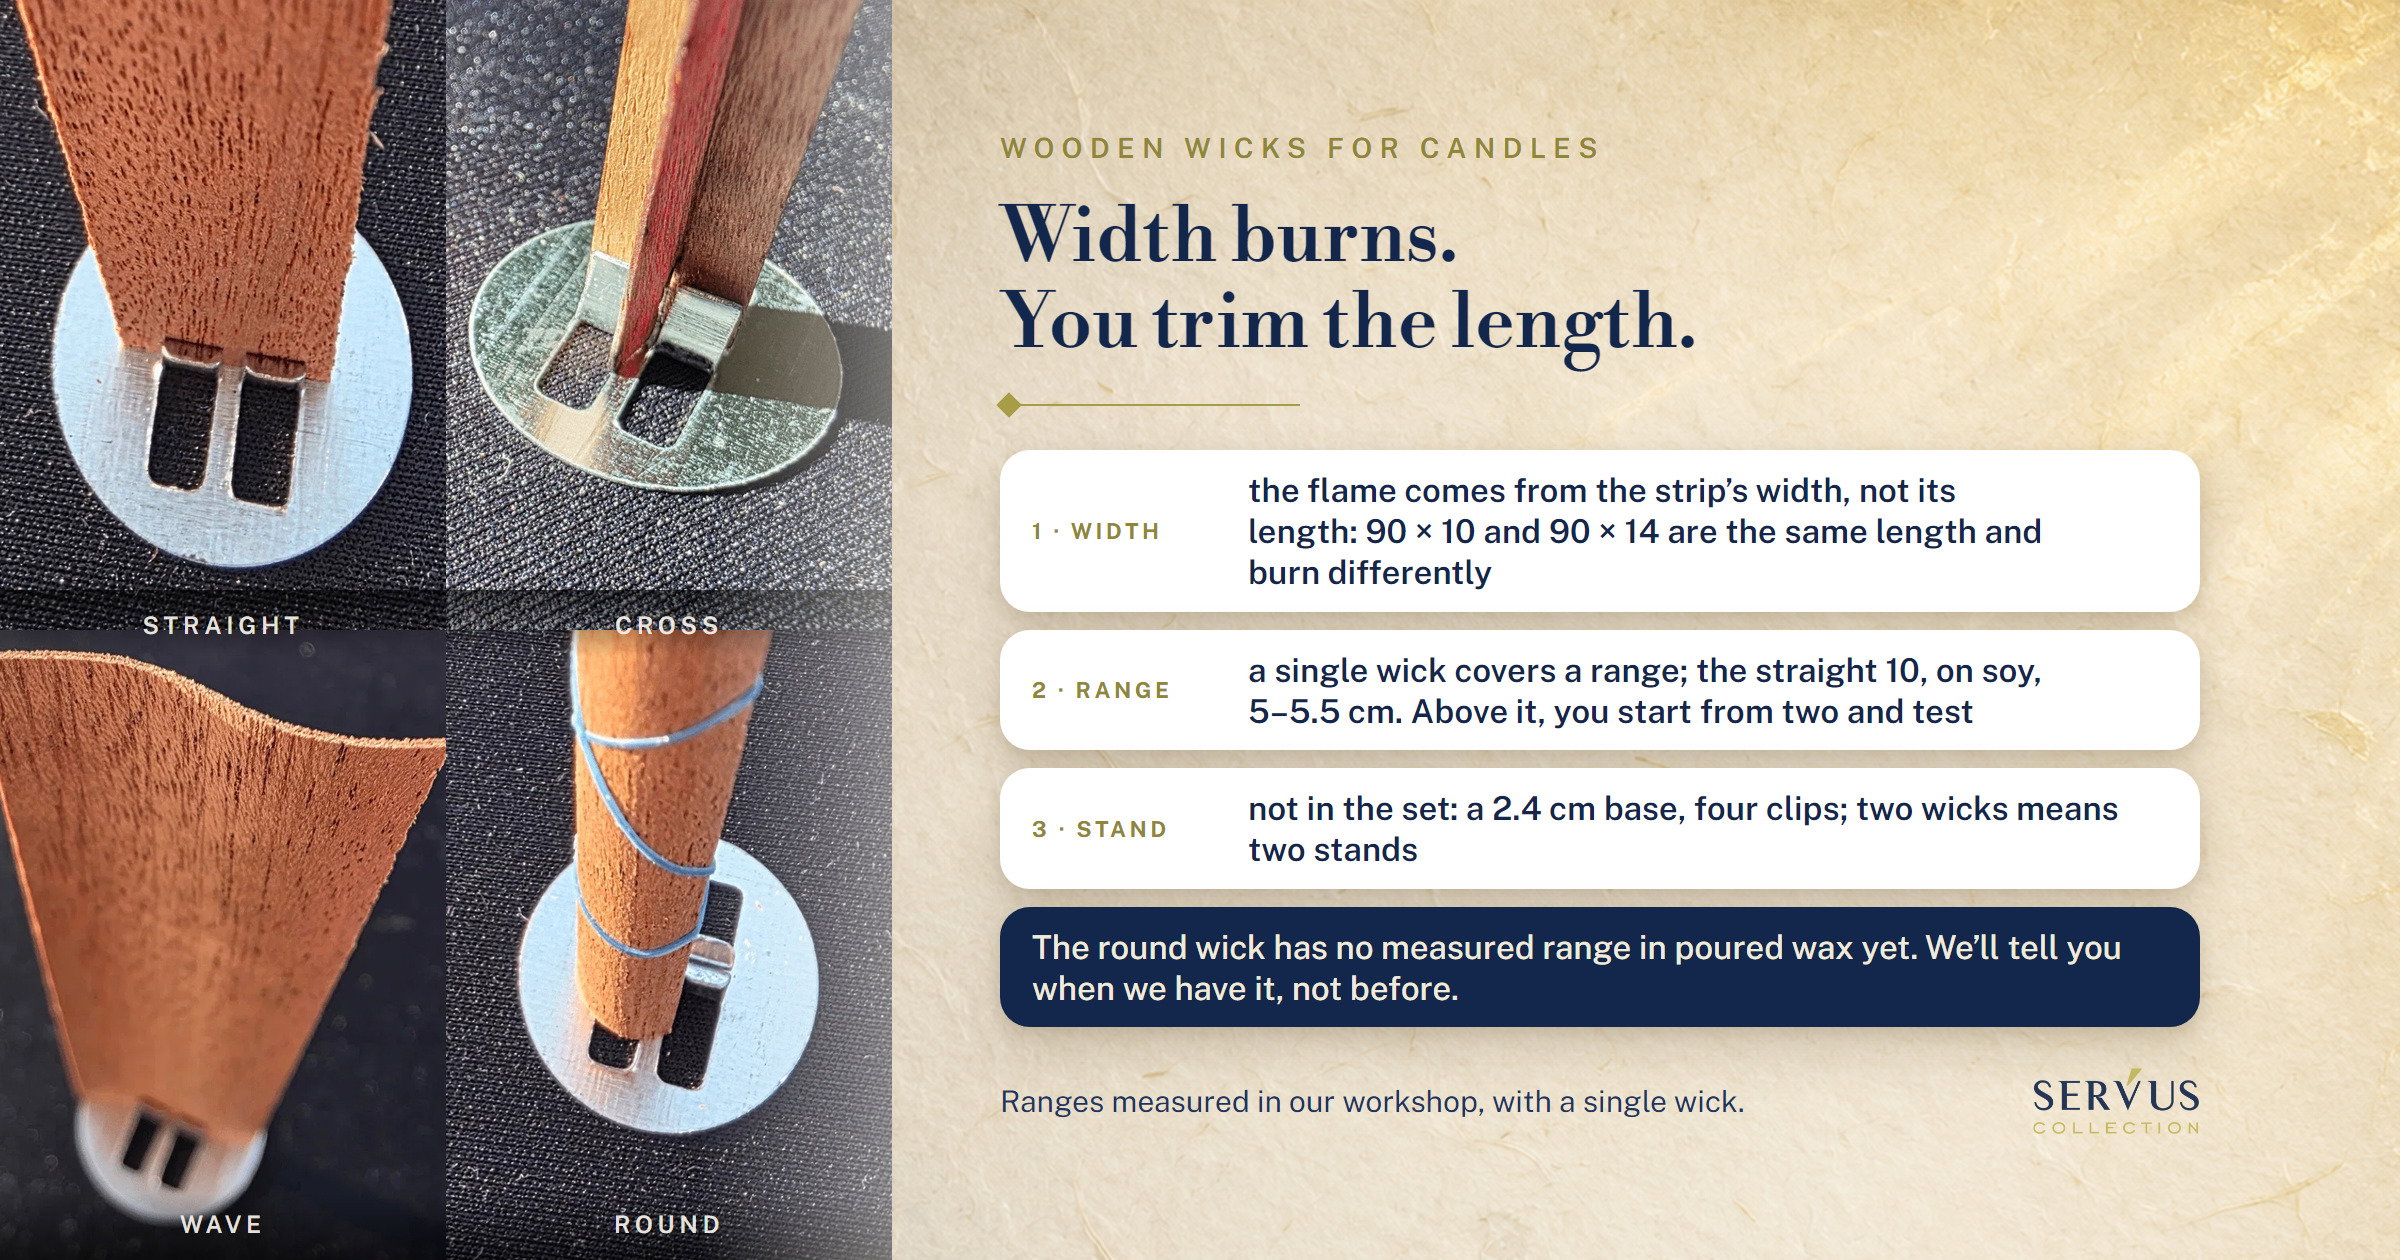
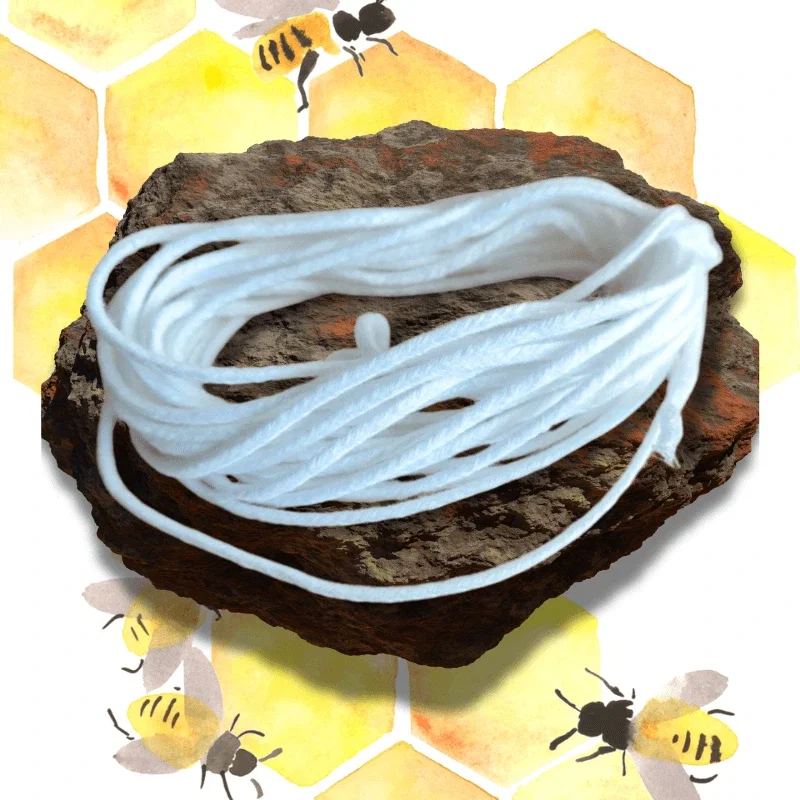
You ordered a set of wooden wicks, unpacked it on the table and looked for the metal stand. It wasn't in the box. Or you took the 25-millimetre wave wick because it looked like the strongest on the shelf, and in the wide jar you had, the flame stayed small. We know both scenes from customers, and both come from the same thing: wooden wicks are bought by different rules from cotton, and nobody writes those rules on the packaging.
A wooden wick for candles is chosen by the width and thickness of the strip, not by its length, and each shape has a range of diameters that we tested with a single wick. If your glass is above that range, our product pages say “use two”, with two stands that don't come in the set; we haven't measured the figure for two, so that's where your test begins, not a recipe. The length is yours: you trim it to the glass you're pouring into. The figures below are the ranges we measured ourselves, in the workshop, on every shape we sell, plus what we haven't measured yet, and we say so.
Below: why width matters with wood and what the measured range is; the four shapes in a single table, with what we know and don't know about the round one; how it's fitted, how many wicks you use and at what height you trim; what can go wrong and what you check first; and what to order for your first test.
I'm Sînziana. In our workshop in Maramureș, Romania, we've been pouring candles since 2010, and we sell on the wicks, waxes, fragrances and dyes we use ourselves. We burned the wooden wicks in our own recipes before writing their range on the page, for four of the five wicks; for the fifth we haven't gathered enough batches in poured wax, and I say so below rather than hiding it in a pretty number.
How do you choose a wooden wick for candles, if cotton tables don't carry over?
You choose it by the width of the strip, at the thickness we sell, and by the range of diameters that shape covered with a single wick in our tests, on your wax: soy, pearls or paraffin. A cotton table doesn't help you here: there the size is a number of threads, here it's a strip with a width and a thickness, and one doesn't translate into the other.
The two mistakes from the start, buying by length and buying by the biggest number on the label, come from the same reflex brought over from cotton. A 90 by 10 wick and a 90 by 14 wick are the same length and burn differently, and the wave wick's 25 millimetres don't make it the strongest in the range. I come to each of them below.
Why do width and thickness matter with wood, not length?
Because you trim the length anyway, to the height of the glass, and what stays in the wax and decides the flame is the strip: how wide it is and how thick. The wider the strip, the bigger the flame and the faster the melt pool opens; two 90-millimetre wicks, one 7 wide and one 10 wide, are two different wicks, however alike they look in the box. That's what we write on the page of each of our wooden wicks, and that's what we've seen in the workshop.
Thickness is the second figure, and it's the one nobody asks about. All our strips are 0.6 millimetres, and the cross is two 0.6 strips slotted into each other. The American patent for the flat wooden wick, granted to Lumetique in 2013, gives the tested thicknesses as between 0.019 and 0.028 inches, that is between 0.48 and 0.71 millimetres, and says that plant waxes tend to need a thicker wick than paraffin; our 0.6 strip sits within that range. An American maker of wooden wicks, makesy, in its 2022 selection guide, separates the two figures the same way: width decides the diameter of the melt pool, thickness decides the size of the flame and the burn overall. We work with a single thickness and let width and shape make the difference; that's why our table is by width and shape, not by thickness.
How much does a single wooden wick cover, and what is the “measured range”?
A single wooden wick covers a range of diameters, not one diameter, and the range is different on each wax: in our burns, the 10-millimetre straight strip held a soy glass of 5 to 5.5 centimetres, a pearl glass of 5.5 to 6 and a paraffin glass of 4.5 to 5. On the product pages we call it the wick's “band”; here I call it the measured range, so it's clear at every step what I'm comparing: your glass with the range. A glass below the range: the wick is too big for it. A glass above the range: however long you leave it lit, the flame stays small and the wax at the edges doesn't melt.
We measured the range by burning one wick at a time, and it's a starting point, not a promise: your glass, your wax recipe and how much fragrance you add move the figure up or down. A wick that left you with cold edges isn't a weak wick. It's a wick put into a glass wider than its range, and there you look for a shape with a wider range or, if none reaches, you start from two, with a test. We write this difference on every product page, so it isn't discovered after the first batch.
Three families of wick, three ways of counting them
On our shelf there are three families of wick, and each is measured differently. Braided cotton, Schreiber's SKS series, works with stearin and with paraffin with stearin, in candles poured in a mould, and is chosen by the number of threads, from 3x6 to 3x12, starting from the candle's diameter, as the 2025 wick guide says. Waxed cotton with a tab, the SHW series, works with soft container waxes and is chosen by burn diameter and height, with the code on the page, from 30 for a glass of about 3 centimetres up to 100 for one of 10. Wood is the third family: it's chosen by width and shape, with the range from the table below.
There's no “wooden equivalent” of a 3x10, and a good waxed-cotton table tells you nothing about the 14-millimetre strip. What carries over is the method: you choose by your diameter and your wax, then check in the glass, with the 0.5-centimetre rule from the container guide, which applies the same way to cotton and to wood. What doesn't carry over are the figures.
The four shapes, measured by us, in a single table
We sell five wooden wicks, in four shapes: two straight strips, 10 and 14 millimetres wide, a cross made of two slotted strips, a 25-millimetre wave and a round tube 10 in diameter. All have a 0.6-millimetre strip. In poured wax, they all fit on the same metal stand; in candle sand, put into the glass without melting, the strip goes straight into the pearls, with no stand, as its page says. The difference between the shapes is the line they burn along, and that's where each one's range comes from.
Which shape for which diameter? The table of single-wick ranges
Each shape's range with a single wick, measured in our workshop on three container waxes, is in the table below; for the round one, we don't have a figure of our own on any of the three waxes and we don't borrow one.
| Shape | Soy | Pearls / granules | Paraffin | Line it burns along | When you choose it |
|---|---|---|---|---|---|
| Straight 90 × 10 mm | 5–5.5 cm | 5.5–6 cm | 4.5–5 cm | a straight line | small and medium glasses; the starting point |
| Straight 90 × 14 mm | 5.5–6 cm | 6–6.5 cm | 5–5.5 cm | a straight line, wider | when the straight 10 falls behind with the melt pool |
| Cross 80 × 10 mm | 6–6.5 cm | 7–8 cm | 5.5–6 cm | two perpendicular lines, symmetrical flame | the widest ranges in our line; when the straight one left you with cold edges |
| Wave 90 × 25 mm | 5.5–6 cm | 6–7 cm | 5–5.5 cm | a winding line, longer than the distance between its ends | when you want the pool to open more evenly, in straight-sided glasses; its range is like the straight 14's |
| Round, tube 90 mm × Ø 10 mm | not measured | not measured | not measured | a ring, in all directions | the manufacturer gives it for candles over 10–12 cm; your test decides |
How to read the table: look for your wax's column, not the shape's row. A 6-centimetre jar of soy? The straight 10 stopped at 5.5, the straight 14 and the wave reach 6, the cross starts from 6. Three shapes cover it, and the difference between them is no longer “how strongly it burns” but how the melt pool opens: along one line, along two or along a wave. 8 centimetres of pearls? Only the cross got there with a single wick; with any other shape you're outside the range. On paraffin, all the ranges came out half a centimetre lower for us than on soy; the product pages don't say why, and I won't guess here: what matters to you is the column, not the explanation.
How they were measured, and what isn't written down: one wick at a time, on each shape, in wax put into a glass, and the figure is the diameter of the glass the pool covered; that's what each product page says. What isn't noted on the pages, and that's why I don't write it here as if I knew it: the exact wax within each family, whether it was scented and by how much, the glass. That's why the half-centimetre in the table is the range in which it held for us, not a laboratory specification; at your end, the test below confirms it or moves it. The “pearls / granules” column is candle sand, which goes into the glass without melting, with the strip pushed straight in, no stand. The figures in the table are the ones on the wicks' pages, the most recent.
Why isn't the 25-millimetre wave the strongest on the shelf?
Because the wave burns along a winding line, not across the width on the label, and the range we measured for it sits next to that of the 14-millimetre straight strip: soy 5.5–6, pearls 6–7, paraffin 5–5.5. The 25 millimetres are the distance between the ends, not the burn line. Whoever buys it as “the widest, so the strongest” ends up with a jar the flame doesn't open.
What you gain with the wave is the way the pool opens: more evenly across the whole width of the glass, which shows in straight-sided containers. It's a tool for the shape of the glass, not for its size. Its page says, with my name next to it, “this is where most people go wrong”, because this is exactly where I've seen them go wrong.
What don't we know yet about the round wick and about moulds?
We don't know the round wick's range on soy, on pearls and on paraffin, and we have no burn of our own on record for a wooden wick in candles poured in a mould. With the round one, the tube burns all the way round: the heat comes from a ring, and that's a different way of burning, not a bigger strip. What we have on it doesn't add up. The manufacturer's data sheet gives it for large candles, over 10–12 centimetres. Our older descriptions spoke of a flame more concentrated than the cross's, which isn't necessarily the opposite: a flame can be both concentrated and large. We won't settle it with a pretty number; we'll settle it when we burn it in the three waxes. Until then, the honest answer is your test on the final recipe, and it's a test you do with your eyes on the flame.
Moulds are simpler to explain: our wooden wick is for containers, with a metal stand, and that's how we sell it. The manufacturer also declares it for free-standing candles poured in a mould; we have no burn of our own on record there, so I won't give you a range and I don't recommend it for pillars. For moulds, with stearin, braided cotton remains the choice.
How do you fit and burn a wooden wick so it doesn't spoil your candle?
It's fitted on a metal stand with a wide base, bought separately, one for each wick; it's cut to the height of the glass before pouring and to half a centimetre above the wax before each lighting; and the first time it's burned until the melt pool reaches the walls, within the time and behaviour limits below. All three are written on each of our product pages, and we made the first one the first line on the page after customers discovered the missing stand only when they unpacked.
Why doesn't it come with a stand, and why does the wide base matter?
Wooden wicks are sold without a stand because of workshop arithmetic: you trim the strip to the glass, and the offcuts make wicks for smaller jars, so a set of 20 gives you more than 20 candles; stands can't be cut and run out first. With a fixed set you're left with strips and no stands. That's why we keep them separate, and that's why the first sentence on the page of each of our wooden wicks says the stand isn't included.
Our stand has a 2.4-centimetre base and is 0.7 centimetres high, with four clips that grip the strip whatever its profile: straight, cross, wave or tube. The wide base is what counts at the moment of pouring: the warm wax pushes on the strip, a narrow stand tips to one side, and the candle sets with the wick crooked. On the stand's page we write that the first minutes of burning are when you see whether the base held. You can reuse it as long as the clips stay straight; bent, they no longer grip. Don't buy it for cotton: the waxed wick has its own tab. And you don't need it for candle sand: there the strip goes straight into the pearls.
One wick or two? How you decide before pouring
You decide from the table, on your wax, in this order: if the glass diameter is within a shape's range, you take that shape; if it's above the range of the shape you have, you first look for a shape with a wider range; if it's above the range of all of them, our product pages say “use two”, and here I have to be precise: we haven't measured the range for two wicks. Which width, how far from the centre, in which glass, I can't give you from the table; two is the point your test starts from, not a figure. And if the glass is below the shape's range, you don't take a bigger one: you go down to a smaller width.
An example, on the figures in the table: a 7-centimetre jar of soy. The straight 10 stops at 5.5, the straight 14 at 6, the cross at 6.5. With a single wick, no shape in the table reaches 7 on soy; so there's nothing to copy, only something to test: two wicks, for example two straight 10s, equally spaced from the centre, with two stands counted in the order, and one piece burned to the protocol below before any series. And each new combination, two wicks instead of one, another wax, another fragrance percentage, is a new test, not an assumption. On soy, pearls and paraffin, the wick calculator does the same sum: give it the diameter of the glass and it tells you which shape falls within the range, or that there you start from two wicks.
What height do you trim it to, and how does it burn the first time?
You trim it to half a centimetre above the wax before each lighting, with the blackened tip removed, and the first time you let it burn until the pool reaches the walls, with your eyes on the flame and a clock beside you. The half centimetre is our workshop practice, the same one we wrote in the article on pouring safety and in the one on the first burn, and it's close to what wooden wick makers recommend: makesy writes 3/16 of an inch, about 5 millimetres, while Armatage Candle Company's beginner's guide, from 2021, and a candle-making guide from November 2025 go down to an eighth of an inch, about 3 millimetres. A wick left longer burns with a big flame and gives off smoke, and with wood the charred tip breaks into particles that stick to the walls of the glass.
Length has one more role, just one, and it's at the point of buying: the strip has to reach from the stand to above the wax. At 90 millimetres, with 7 held in the stand and half a centimetre above, it's enough for a glass filled to about 8 centimetres; any taller and the wick stays under the wax, however well you chose its width.
The first burn decides the rest: if you put it out before the pool reaches the walls, the following burns start from the trace of the first, the dip in the middle and the ring of untouched wax at the edge, and that's where tunnelling begins; it's written in the article on the first burn and I won't repeat it. But “to the walls” has two limits you set before lighting. The first is time: the American association of candle manufacturers generally recommends no more than four hours per burn and at least two of cooling before the next, because too long a burn lets carbon collect on the wick, makes it “mushroom” and the flame grows; and a wick that hasn't opened the pool in four hours has already given you its answer. The second is behaviour: smoke, a flame that flickers or jumps, a glass you can no longer hold in your hand, two flames on the same wick; at any of these you put it out and note it down, whatever the clock says.
What can go wrong with a wooden wick, and what do you check first?
Three things, each with its own check: a weak flame or a pool that doesn't reach the walls; a flame that jumps and wax that goes quickly; and the same strip burning differently from one batch to the next. None of them starts with “more fragrance”, and the first starts with the flame, not with the table.
Why does the flame stay small and the edges cold?
These are two different situations, and you tell them apart by the flame, not by the edges. The first: the flame is weak, drowns, goes out or doesn't catch. Here width doesn't help you, and neither does a second wick: makesy puts this case down to the thickness of the strip, not the width. We sell a single thickness, 0.6 millimetres, so what you can check is the rest: the wick trimmed to half a centimetre, no shorter and no longer; the wax and the fragrance percentage, since a richer or more heavily scented recipe drowns the strip; and the batch of wood, below. If on your recipe, with all of these in place, the flame still drowns, our strip isn't the wick for your recipe, and I'd rather tell you that than sell you a second set.
The second: the flame is steady, between one and two centimetres, with no smoke, and after two hours the pool still doesn't reach the walls. This is the case from the table: the glass is above the shape's measured range, on that wax. Here makesy says the same thing we write on our product pages: keep the thickness and go up in width. First you check the diameter against the table, then the wax: on paraffin the ranges sit half a centimetre below the soy ones. If another shape covers the glass on its own, you take that shape; if none does, you start from two, with the test above.
What you don't do, in either situation, is leave it longer so it “draws” more, or add more fragrance: a long wick gives you flame and smoke, not a wider pool, and extra fragrance in a recipe that doesn't open properly burns off for nothing. The fragrance question is one I get often, and I wrote it up in the container guide as the compensating-fragrance mistake; with wood the answer is the same.
Why does the flame jump and the wax burn down fast?
Because the glass is below the shape's measured range, meaning the wick is too wide for it, or because the wick is trimmed too long. The cross in a narrow jar makes a big flame that dances and eats the wax fast; the straight 14 in a small glass burns just as fast, with the flame leaping. That's what we write on their pages, and it's why, below the range, you go down to a smaller width rather than trimming the wick shorter. The second thing to check is the height: anything beyond half a centimetre above the wax adds flame, with any shape.
The test that tells you whether it's serious is the one from our container guide, which we also do with a new recipe: two hours of burning, after the poured wax has rested as long as its data sheet asks, with the clear glass looked at from the side. The threshold is ours, from our tests: a pool of liquid wax deeper than half a centimetre below the surrounding solid surface means the wick is too big; over a centimetre, it's clearly too big, however good it looked in the first hour. I say it's ours because it doesn't hold everywhere: makesy, on their wicks and waxes, takes as a reference a pool of about half an inch, that is 1.27 centimetres, more than twice our threshold. And with us too, depth is not the sole sign: before it come the flame, which should stay between one and two centimetres, without flickering and without smoke, and the glass, which shouldn't be scorching after two hours. Armatage adds its own stop thresholds, at any hour of the test: a flame over three inches, about 7–8 centimetres, a glass over 150 degrees Fahrenheit, about 65 Celsius, or two flames on the same wick; safety thresholds, not tuning ones.
Wood isn't a uniform material: why we burn a test piece with each batch
The grain differs from one strip to the next, and the difference doesn't show in the box, it shows in the glass; that's why we light a test piece with each new batch, before the series, and that's why we ask you to do the same. A strip from the next batch may open the pool more slowly or less fully than the one before, and you can't see that on the strip, you see it in the glass.
What we know about this wood and what its manufacturer declares are two separate columns on every product page, and I keep them separate here too. Measured by us: the shape, the dimensions, the 0.6-millimetre thickness, the diameter ranges and the fact that it fits on a stand. Declared by the manufacturer, from its data sheet, without a test at our end: the species (an exotic hardwood, Sapele type), moisture between 6 and 10 per cent, wood that isn't chemically treated, laser cutting and the FSC certification of its timber supplier, a document we don't hold ourselves. I give you these as they were given to us, with its name on them. What you won't find from us, on the product page or here, are the words “smoke-free” or “clean burn” next to a wick: smoke depends on the recipe and the wick height, it isn't a property of the strip.
The crackle also comes under “it depends”: in some recipes and glasses you hear it, quietly, like wood in a stove; in others you don't, and that's why we don't promise it to anyone. Lumetique's patent explains why: the sound comes from pockets of gum and resin in the wood, and its volume depends on the species; the Rosaceae family, cherry for example, crackles louder. With a single species on the shelf, what's left to vary is the wax and the glass, and that's why the same strip can crackle in one recipe and stay silent in another.
Where to start
Start with the shape the table gives you for your glass and your wax, with the stand for it if you're pouring wax, and with a single test candle, burned to the protocol below and taken down to the bottom of the glass before the series. A set of 20 means 20 candles at one wick per glass, plus whatever the trimmed offcuts give you for small jars; at two per glass, 10.
What do you order for the first test?
You order the shape whose range fits and the stands according to the number of wicks, then pour the final recipe, not a “trial” one with another fragrance. The steps, in the order we do them with a new recipe:
- Measure the inside diameter of the glass at the level the wax will sit; if the glass widens or narrows along its height, take it at the widest point the pool has to cover. Write down the wax: soy, pearls or paraffin.
- Choose the column in the table for your wax. Is the diameter within a shape's range? That one. Is it above the range of all of them? Start from two wicks, with two stands, as an option to test, not as a figure.
- Cut the strip to about the height of the glass (at 90 millimetres, a glass filled to about 8 centimetres), clip it into the stand, set it in the centre before you pour and hold it straight until the bottom layer sets; with two wicks, equally spaced from the centre. With candle sand you don't pour anything: the pearls in the glass, the strip pushed straight in, no stand, as its page says.
- Wait as long as the poured wax needs: for our waxes, 48 hours where the data sheet gives a number, and 48 as a guide where it doesn't; with pearls there's nothing to wait for. Only then trim to half a centimetre and light it.
- Burn it for two hours and look through the glass from the side. A flame of one to two centimetres, no smoke, the pool at the walls and no deeper than half a centimetre? The wick has passed the first filter. The pool doesn't reach the walls, with a steady flame? A shape with a wider range; if none covers it, two, another test. The pool over a centimetre, the glass hot, the flame jumping? A smaller shape.
- Carry on with the same candle, in burns of no more than four hours, with cooling in between, down to the bottom of the glass. Our container guide says overheating sometimes shows up in the third or fourth hour, and Armatage doesn't consider a wooden wick chosen until the candle has reached the end without failing. Only then is the wick right for your recipe, and only then do you order for the series.
With the table above and the six steps, a set of 20 is enough for your first batch and its tests. If you've stopped between two shapes and don't know which, take the one with the narrower range: a wick too small for the glass leaves you with cold edges, but the glass stays intact and the next test is done with another strip; one too big heats the glass, and that's the safety part, not the looks.
What to send us if it doesn't work
Send us the wax, the inside diameter of the glass, the shape and width of the wick, how many you used, the fragrance percentage and a photo of the glass after two hours of burning, taken from the side. With these we can tell you whether you're within the range or outside it; without them we'd be guessing, and we don't guess on your batch. On WhatsApp or by phone, at +40 726 162 810 (we answer in English), Monday to Friday, between 8:00 and 16:30 (Romanian time). And if you've burned the round wick in a recipe of your own, write and tell us how it went; it helps us know where to start when we burn it ourselves.
A wooden wick isn't chosen by how it looks, and it isn't chosen by the biggest number on the label. It's chosen by width, put into a glass within its tested range, on a stand with a wide base when you pour wax, and trimmed to half a centimetre. The rest, the crackle, the batch, the round wick, is wood: it varies, and we burn it before we promise it.